Thursday, September 30, 2010

Fabric Luggage Tags - Craftmad Sewing Swap


Morning everyone, hopefully a quick post today as we are loosing power at 8am and I can here the trucks going up and down the street in preparation.  :-0

I have had fun with my sewing machine creating these wonderful Fabric Tags for our September Sewing Swap over at Craftmad.  I have used a pattern from the Make It and Love It blog.  Actually I was very pleased with myself as it only took me a short time with the easy to read instructions.  11.30 am I was checking out the online instructions and at 3pm my two fabric tags were enveloped and driven 1/2 hour  and put in a mailbox for my partner.
So I think I will be making a couple more of these real soon.

Happy Thursday everyone.  Think of me with no power for maybe 6 hours and two teenagers on holidays in 30C temps.  

Startistic Designs Candy ends 8th October


Morning everyone, thought I would share with you the fact that my friend Stacie from the US has just opened her own online store.  Yes, it's called Startistic Designs ............. great name hey!  Stacie is offering Candy to help celebrate the opening of her new shop.
So be sure to visit and enter the candy here.

Tuesday, September 28, 2010

Winners List for Homemade with a Hop

Yes, the huge list of winners is here.   Congratulations to all the lucky winners and thanks again for taking your time to visit all our blogs.  If you are a winner of my blog please send me an email if I have not contacted you yet.  Thanks.


FINAL LIST OF WINNERS


JOANNE GILCH of "Cardology Etc" wins the grand prize of a gift certificate to
the store of her choice! 
Joanne visited every blog so she will receive a $50.00 gift certificate!


From Stamping Vacation (Denise)
:


NEETI of "Potpourri of Art Decor" wins the prize from Ooh-la-la!


From Crafty By Nature (Danielle)

Andrea - http://andreajbpiecesofmine.blogspot.com/ Prize from Little Claire
Christi Hicks - http://www.blogger.com/profile/02932957085115574069 Prize from the Cutting Cafe
Pat - http://pgarvin.blogspot.com/ Prize from SkyBluePink

From Dreaming And Creating (Karen)
Stampsmith Gift Certificates go to:
Ira of Ira's Crea Corner
Kay
Janet of Life Full of Sunflowers
Kym Crafty Cards

From All Things Crafty (Stacie)

Kay from http://willtradesleepforstamps.blogspot.com/ Practicing Creativity Design (stamp set of winner's choice) 
Lois B from http://loisb-loislane.blogspot.com/ First $10 Rubberstamp Ave. gift certificate  
Becky B fromhttp://scrappinbeckyb.blogspot.com/ Second $10 Rubberstamp Ave. gift certificate 

From Free-4-Ever (Corry)

Ruthie of "Gotta Find a Cool & funky Name" Die Cuts from Die Cuts Dreams Store
Rhonda of "Rhonda's Creative Spirit" Prairie Fairy images

From Life is Beautiful (Audrey)

Kym's Craft Cards wins the $50.00 gift certificate from Sunflowers and Dragonflies
Karen B from Memories Unleashed wins the stamp set of her choice from Sparkle
and Sprinkle.

From Aspiring to Creativity (Dana)


Margreet http://margreets-scrapcards.blogspot.com/ The Pixie Cottage gift certificate: B-Jo http://buzzygreen.blogspot.com/ Lawn Fawn stamp set

From Merrymade Cards and Crafts (Merry)
Lou Lou Shive of http://louloushive.blogspot.com/ $25 Sticker Store gift certificate
Jennifer of http://insanedaze.blogspot.com/ $25 Sticker Store gift certificate
Janet of http://lifefullofsunflowers.blogspot.com/£10 voucher for Lili of the Valley 

Emu Creations (Annmaree)
Joanne Gilch http://cardologyetc.blogspot.com/ 4 Meljen Images
CrafterGM http://craftergm.blogspot.com/ $10US Certificate to Really Reasonable Ribbon  

Coldwaters2 (Lorraine)
Christi of http://christi-hicks.blogspot.com wins digital images from
Glitterbabe's Art
JLJ Designs of http://jljdesignscraftingblog.blogspot.com wins a $25.00 gift
certificate from Victorine Originals

CONGRATULATIONS everyone.

Acetate Card


Morning everyone,  the day started with a light sprinkle but the sun is out now.  Daughter is off to the beach and son out for a bike ride with mates.......school holidays. :-)

Today I have an acetate card to share with you.  Our swap theme this month over at Craftmad was two acetate cards.  Now this card should almost be on my partners doorstep and fingers crossed she doesn't visit here before opening the envelope.  Otherwise.......Surprise!!!! Beth this is what one of your cards looks like.

I have never made an acetate card before or very rarely use it on a card.  So this was a real challenge.   These cards always look so clean and simple.  Hmmmm....not!  It was a challenge for me to remember where the tape would show through on the other side of the card and how to cover it up and line it up.  In the end though I am really happy with this card.  Dug out this cute bird stamp from Stampin Up Good Friends set.  I inked him up with my SU stamp spots of Ballet Blue and So Saffron.  Cut him out and used 3D foam to stick him to the SU Good Morning Sunshine design paper and SU Kiwi Kiss.

Now my other acetate card I made to fit into one of the challenges over at Stamping Vacation and can't show you just yet as the challenge has a couple of days before it starts. ;-)

Wishing you all a great Tuesday.

Winners are being drawn....

Hi everyone, just wanted to let you know that the Homemade with a Hop is now closed.   Thanks so much to everyone that took the time to HOP around all the Design Teams blogs.  I really appreciate all your wonderful comments and I think I was beaming all weekend. :-)

Wanted to let you know that all the names are now going in to hatS for random draws on the appropriate blogs and for the major prize.  We will all be posting winners at the same time which is 8am Central US time.....which means for me (Aussie) tonight, Tuesday, 28th September 11pm.

So fingers crossed everyone.

So now you have seen all the fun that we have as a Design Team don't forget to see what we come up with in the various challenges for Denise over at Stamping Vacation.  Post a photo of your creation into the appropriate challenge to be in the running for the monthly prize.  REMEMBER you can enter as many challenges as you like as many times as you like. This month (and only two days left).....a $25.00 gift certificate to FLOURISHES

Monday, September 27, 2010

Less than hour left of the Homemade with a Hop

I almost forgot, I did these ages ago and my friend Mandy turned them into a topper sheet which you can buy here.


Yes, be quick and join all the other wonderful people that have been by to visit all the Design Team blogs as part of Homemade with a Hop.  Less than an hour to go as I post this.  So many wonderful homemade embellishments.....my 'To Do' list has definitely grown.  Remember to be in the chance for any of the prizes you must leave a comment on the appropriate Design Member blog or for the Major Prize leave a comment on all ten blogs to be in the running for a $50.00 gift certificate to the store of your choice.

Good luck but be quick.

Before I go.....I just want to say thank you so much to everyone for their beautiful comments.....very appreciated. :-)

For details on the hop....go to my post here or start at the Stamping Vacation here.

Saturday, September 25, 2010

Homemade with a Hop - Stamping Vacation


"Welcome to your third stop of 10 on Stamping Vacation's first blog hop:

Homemade with a HOP!

Here is my Homemade Embellishment for you ....... a Tear Bear Present Topper.  Great for Birthday or Christmas.

Keep scrolling to the end if you are wanting details of the next person to hop to. Remember to leave a comment to be in the draw for one of the two $25.00 gift certificates from 


and a £10 voucher from

and also to be in the running for the Grand Prize of up to $50.00 gift certificate from a store of your choice.

How to create this card.......I started with a blank white base card.  Then used all these fabulous reducing star stickers from the Sticker Store to decorate the front of the card.  Note....that some of the stars I have cut in half and attached to the front of the card to make the stars look like they continue over the edge.  I have also added a black 'Happy Birthday' greeting to the final card and small gold sticker stars to the red ribbon strips on the present topper.
The Tear Bear Present Topper - I started with thick handmade paper or thick mulberry paper,  coins to trace around or anything circular, aquabrush or paint brush and water, small oval punch, black card.
Trace around the edge of your coin with your aquabrush on the handmade paper.    Make sure there is enough water to soak in but not too much that it oozes to far under the coin.
Now pull the circle away from the handmade paper.  Repeat this with the smaller coin so that you have four small circles and this big circle.  You also need a smaller oval shape for the bears nose.  I freehanded that.
Now grab an old toothbrush or hubbies ;-) and go around all the edges to make them nice an fluffy.  Just pull the brush to the edge.
If you have chalks dig them out and highlight the edges with a darker shade colour than the paper.  Add pink to the inside of the ears.
Now punch out two small oval shapes from the black card.  One oval is for the nose.......the other oval is cut in half to form the eyes.
Sorry missed a couple of photos here.  To create the present cut a 7cm x 7cm square ...I like striped paper.  Then two strips of paper for the ribbon on the present approx 7cm x 1cm.

Now you can add your bear.

What I like to do is put the bear all together on my crafting surface and adjust how the ears and hands are positioned.  Different angles can really can change the character of the bear.  Once you are happy with the bear just put little dabs of PVA glue (using a toothpick) on to the areas that touch. The glue does not have to go over the entire shape.....I find the smallest amount just so they hold together is best.  The nose .... I have attached the oval handmade paper shape to the face with 3D foam and then attached the black oval with the smallest amount of PVA glue again with a toothpick.  Same with the eyes.  Be sure you are happy with their positions before adding glue.  Using white or silver gel pen add a highlight line to his nose and a dot to each eye.
Tadah!!! all done.
 Now to attach your tear bear present topper to the card.
*******************

This blog hop starts 25th September at 9 a.m. and ends 26th September at 9 p.m.
(US Central time)
For Aussies.....that is Midnight 25th September to Noon 27th September.
We're focusing on different homemade embellishments for paper
crafting and we have a long list of incredible prizes available to be won on
every single blog!

On my blog when you leave a comment you will go into the random draw for a chance of one of the two $25.00 gift certificates available from the 


and a
£10 voucher to

the
grand prize is a gift
certificate to the store of your choice. The amount will depend on how many
blogs you visit during the blog hop. The gift certificate will equal $5.00 for
each blog you visit AND comment at. So there are 10 blogs which means the gift
certificate could equal up to $50.00!!!! But if you only visit one blog, it
would just be $5.00.

And what else can you win? You won't believe this! Here is the list of prizes:

-stamp set from Practicing Creavity Designs

-2 $10.00 gift certificates from RubberStamp Ave

-2 separate gift certificates from the Sticker Store

-a 10 pound gift certificate from Lili of the Valley

-$50.00 in supplies (which include prima flowers, versafine ink, Basic Gray
paper and Stamp Rite Stamp Set-All Occasions) from
Sunflowers and Dragonflies

-stamp set from Sparkle and Sprinkle

-$25.00 gift certificate from Sky Blue Pink

-3 stamp sets from the Cutting Cafe

-prize from Little Claire Designs

-diecuts from Die Cut Dreams

-digital images from Prairie Fairy Designs

-4 separate $10. gift certificates from The StampSmith

-stamp set from Lawn Fawn

-$15.00 gift certificate from the Pixie Cottage

-4 images of the winner's choice from Meljen Designs

-$10.00 gift certificate from Really Reasonable Ribbon

-digital images from Glitterbabe's Art

-$25.00 gift certificate from Victorine Originals

Can you believe that list? There's over $300.00 in prizes! You MUST comment at
the blogs to win the prize. If you don't have a blog, be sure to leave your
email address so we can reach you. Winners will be announced on September 28th!

Your next stop on our hop is Audrey's  who will be offering $50.00 in supplies:
 prima flowers, versafine ink, Basic Gray paper and Stamp Rite Stamp Set-All
 Occasions) from Sunflowers and Dragonflies.
and a stamp set from Sparkle and Sprinkle.
Be sure to comment for your chance to win.

And here is the complete list of blogs on the hop:
STAMPING VACATION - Denise
ALL THINGS CRAFTY - Stacie
MERRYMADE CARDS AND CRAFTS - Merry - Me!
LIFE IS BEAUTIFUL - Audrey
CRAFTY BY NATURE - Danielle
FREE 4 EVER - Corry
DREAMING AND CREATING - Karen
ASPIRING TO CREATIVITY - Dana
EMU CREATIONS - Annmaree
COLDWATERS 2 - Lorraine

Thanks for hopping by!! Hope you enjoyed Homemade with a HOP! Be sure to leave
a comment if you want a chance to WIN!

Homemade with a Hop Starts very soon


Yes, that right not long now until Homemade with a Hop starts.
9am Central US Time 25th September to 9pm 26th September

Aussies that is:

Midnight 25th September (tonight) to Noon Monday, 27th September.

Go to Stamping Vacation to check out the incredible list of over $300 worth of prizes.

and I will have on offer when you leave a comment on my blog hop post.....not this post.

Two $25.00 gift certificates to

and a
£10 voucher to

P.S. If anyone knows how I can add a pound symbol could you let me know.  Thanks and see you all there.

Friday, September 24, 2010

Acetate Christmas Cards from a Friend


I just had to share these cards with you as I thought they were brilliant.  This month over at Craftmad our Card Swap was two cards using Acetate.  My wonderful partner HuggiesCrafts came up with these fantastic cards. Be sure to check her album here for more wonderful creations.
This first card I am pretty sure uses Stampin Up papers and baubles.  I just love how she has wrapped the front of the card with embossed acetate.  Such a clever idea.


Now I can tell you that this photo does not do the card justice at all.  It is just stunning in real life.  I so love how she has used the Christmas Tree die cut and then embossed the tree.  The jewels and the gold thread finish it perfectly.  Now the background paper I have been eyeing off and to see it in real life it is truly on my want list.  It is Alison Ellis Design Paper the gold swirls are beautiful.  The buckle along the bottom is actually gold board....not the brown it looks with a lovely christmas greeting sticker.


****On a different note......the countdown is definitely on now......only today and tomorrow until the start of Homemade with a Hop.  Be sure to start over at Stamping Vacation to find out all the details and check out the wonderful prizes on offer.  (Over $300 worth).  To have a chance for the main prize you will need to be a follower of Stamping Vacation.  Each and every Design Team member will have a couple of prizes on offer on their blogs.....so be sure to follow the list.
I will have Two ...yes two chances to win a $25.00 gift certificate to the Sticker Store.  So see you Saturday at midnight.....or Sunday morning.  That is Aussie time I am talking. :-)****

Wednesday, September 22, 2010

Someone Who Needs a Hug


This card I have made for the wonderful Denise over at Stamping Vacation.  It is a time that she needs a couple of hugs.  The card also fits nicely into one of her many challenges over at Stamping Vacation be sure to check them all out.

This card is for the 'To Who Challenge' which asks for a card for 'Someone Who Needs a Hug'.
I used my Aquamarkers to colour this cute little image that someone was kind enough to send to me.  I had fun trying to blend the purple and the pink.  Still need practise but having fun along the way.
The background paper is from a paper pack called 'Something Special.'

So sending hugs and thinking of you and your family Denise.  Take care

Remember everyone to check out all the details for the Homemade with Hop over at Stamping Vacation.  Over $300 worth of prizes on offer and I will have 2 gift certificates worth $25 each from the Sticker Store to giveaway as part of the Hop.

One more Handmade Journal


One last book to share...this was my daughters favourite.  She kept picking it up and feeling the embossed glitter on the swirls.  She also kept reminding me that I have made books for friends, nieces, and other family but not for her.  Guess, I now have something that I can give her for Christmas.  Now to choose the paper.  :-)

The paper I have used is a beautiful Birch Haberdashery Paper.

Tuesday, September 21, 2010

Handmade Journals


A friend got me motivated last week as she had asked for two books to made so she could give as Christmas Presents.  I decided to make four so that she had choices.  While in the process of making these books another friend rang (who's husband owns the bindery I helped out at) and during conversation mention they were going to a Book Fair.  So I thought why not make a couple more so he has more on his table.  So dragged out the rest of my board and had enough for seven journals.  As always I had so much fun creating them.  I wonder why it takes me so long to get my act together.  

For this book I have used a sheet of Anna Griffin, Mackenzie, Lime Paisley Design paper.  The back and spine are covered in a gold buckram cloth.  Some lovely white ribbon, a bit of bling and this wonderful 'Dreams' metal word I found in my collection.


I think this is my favourite....I just love the colours.
I have used wonderful Design paper that at this moment I can't think of where I got it from.  The back and spine are covered in this lovely purple buckram cloth.  I put buckram on the spine so that it won't tear or crease over time with people opening and closing the book.  Found this beautiful purple satin ribbon that is so lovely and wide.  Of course it broke my needle on the second last hole so I had to improvise.  Finished with the wonderful bling flower.


I have always wanted create a journal using the handmade papers with leaves and petals pressed into.  So finally got my chance.  I have matched it up with the gold buckram cloth for the spine and back.  Used some lovely cream ribbon with a gold trim.  Once again went digging in my collection and found this chipboard 'Family' word.  Sorry I took a photo of this before I coloured it gold so it looks much better now.

Monday, September 20, 2010

Christmas Cards for Aussie Troops

Morning everyone.....Monday here and a wet one it is.  Well it has been raining but now I believe the sun is coming out to soak up all the rain and make it nice and humid for us. :-|

Here are the last four cards that I will be sending off to Tracey Hanshaw to pass on to our Aussie Troops serving overseas so they can send back to their families at Christmas.


I enjoyed going through my scrap box of papers once again picking out all the red and green scraps.  I cut them into 3cm squares.  Some pieces already had a lovely texture or pattern.  Other I used my Swiss Dots, Victoria and Diamonds in the Rough embossing folders on.  The green squares above I decorated with holly leaf, clear border and star stickers.  Each card also used these fantastic Merry Christmas sticker greetings.


I had fun with this card.  Cutting out all the squares and triangles to create the little street scene.  I then added this silver Santa sticker so that he looked like he was dashing through the night.


My last card...which took a bit of thinking.  I finally decided on a tree and selected various green scraps which I cut to 2cm width and originally had them all uniform and going down in the correct size.  Next morning I walked in and rounded the corners and accidently put them back haphazardly and the look was so much better.  So out came the cuttlebug again using my favourite folders...Swiss Dots and Victoria.  Grabbed my stickers and decorated the alternate layers with stars, holly and the wonderful star border.  I dotted around the edge with a gold pen and added gold holly stickers to each corner.

I really enjoyed this challenge and think I should do it once a month...gets my brain thinking and scrap box reduced. :-)

Have a good week everyone.

****************************************************

Just a reminder to mark your calendars for the Stamping Vacations Homemade with a Hop.
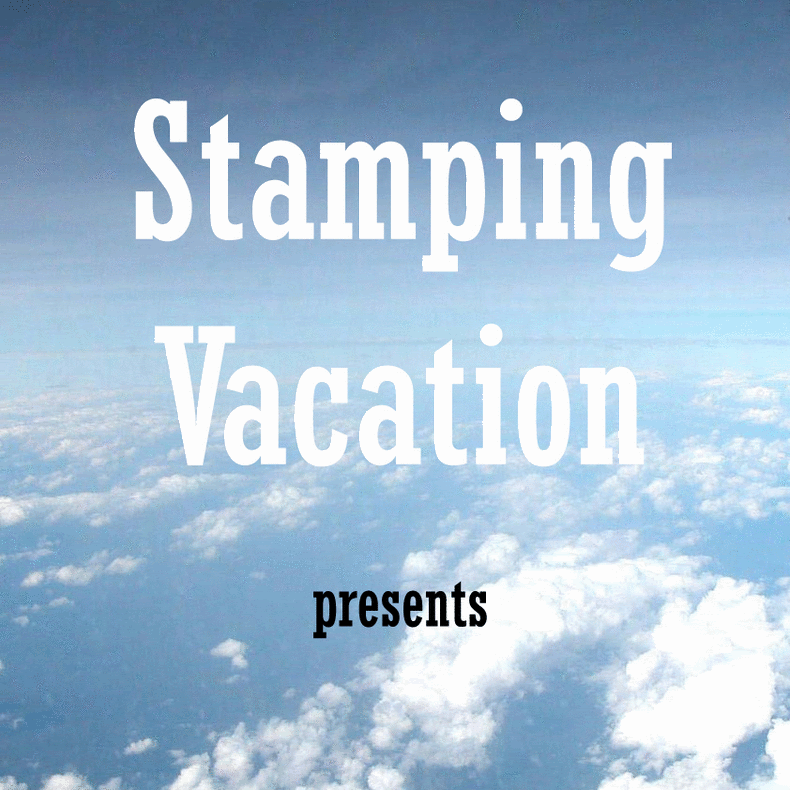
Did you know there are over $300.00 worth of prizes on offer.  Visit Stamping Vacation and see the list of prizes available at the top of the blog.

This is going to be a HOPPIN HOP! Be there starting at 9 am on 25th September through 9pm  26th September  (US central time).

***** Note Aussie people I have converted the time the Hop will happen between Midnight Saturday 25th September to Noon Monday, 27th September.

Sunday, September 19, 2010

Ruth has a Promarker giveaway.


Ruth over at Passion for Cards has a set of 12 Promarkers to giveaway.  
Now that I have tried the Aquamarkers how can I not enter for a chance to try out the Promarkers. 
See you there.
Closes 25th September

Friday, September 17, 2010

Christmas Cards using papers from my scrap box


Yes, two more cards today from my scrap box which will be heading to Tracey Hanshaw and then to the Aussie Troops overseas.  This time I have collected all my purple strips to create a background for this cute little image called Michua and his Christmas Tree.  Sorry I don't know where I found this but if you do please let me know as I would like to link to the owner.  I have coloured Michau with my Aquamarkers and aquabrush.  To make it more Christmassy I have added some Kindy Glitz to the edge of the tree and to her hat.  Finished the card with a couple more layers of card and a silver Christmas Greeting sticker from the Sticker Store.


This bright and cheery Christmas card was fun to make.  I dug out the pink and purple scraps and ran the pink through the Swiss Dots embossing folder.  I added little silver sticker stars and holly bunches to the corners.  Then I used this terrific clear Christmas tree sticker.  Firstly I peeled it from the back and added the little stars and circles which remained on the backing from the circle and star shapes along the edge of the tree.  Hope that makes sense.  Then I stuck the tree to the green card and cut around it.  Added a little brown for the pot, then attached a silver star.  I adhered the tree to the card with 3D foam just to make it pop.  Finished with the perfect Christmas greeting sticker.  All the stickers are from the Sticker Store.

Have a great Friday everyone.

P.S.  Sorry Alicia.....I still have plenty of scraps to work from my box but thanks for the offer. lol

Thursday, September 16, 2010

More Christmas Cards from Scraps


Morning everyone, I have two more cards created from my scrap paper box to send off to the Tracey Hanshaw for the Aussies Troops overseas.  This card I started with the blank white pre-scored card.  Next punched out four blue circles from any blue scrap paper I could find.  I then adhered them in rows with my double sided tape.  Next I printed off this wonderful digital image by Jim Harker called Little Soldier.  I have coloured him with my watercolour pencils and gold gel pen.  Finished by adding a touch of Kindy Glitz.


Now this is not my best card but I like the idea.  I will have to play a little more I think.  Once again started with the plain white pre-scored card.  Went around the edge with my fine tip black pen dotting and dashing.  Next I dug out my Octagon Spellbinders and cut five green baubles and five smaller red baubles.  Layered them up and finished the baubles with these lovely snowflakes stickers (Sticker Store).  Grabbed my fine tip black pen again and hand drew the strings attaching the baubles which you would guess by their crookedness.  :-)  Finished with so silver and white bows and a Christmas greeting sticker.

Wednesday, September 15, 2010

Tilda on a Swing - Easel Card


Hi everyone, I just remembered I can share this card with you now.  I created this for Stacie as a Belated Birthday Card and now I know she has received it.  I dug out my Tilda which I haven't used for a while and coloured her in with my Aquamarkers and aquabrush.  I really liked the way the blue shaded on her dress.  I cut her out and attached her to the swing with 3D Foam.  Then added some layered up punched out flowers.  Finished with a rub-on greeting from Letra-set.  I have used black leather craft card for the base card and Stampin Up Design Paper  (Goodmorning Sunshine).


Before I go today.....as I forgot to add to my post yesterday.  I would just like to say a big Thank you for everyone that takes the time to come and visit me.  Then to the people that click and say that they will follow my blog.  When I started I was happy to be sharing my cards and creations with my friends/family and a couple other people who came to visit.  Never did I dream that I would have 100 people that would want to come and see my cards.

So thanks very much for your lovely comments over time as you do keep me motivated and trying new things. :-)

Happy Wednesday everyone!!!!

Maitland/Newcastle (free) Christmas Cardmaking Day for Aussie Troops

Morning everyone,  I just spied this on my blog wander this morning and thought it was really worth a mention.  Tracey Hanshaw has just announced that Stampin Up as kindly given her some supplies so that people could make Christmas Cards for our Aussie Troops that are serving over seas to send back home to their families.  The only catch is it is at Maitland (NSW)....26th October.....too far for me. :-(

Just click here for all the details.

Tuesday, September 14, 2010

Christmas Cards


On the weekend I sat at my desk and looked at my overflowing scrap box.  Thought I had to do something with all that but didn't want to toss a scrap of it.  Then I remembered the wonderful request over at Tracey Hanshaw's Blog.  They are asking for 1000 handmade Christmas Cards to send to our Aussie Troops serving overseas......so they will have at least one card to send home at Christmas.  So I set myself a challenge.  I grabbed ten blank white pre scored cards and the only paper I could use on my cards was from the scrap box.

This first card I dug out lots of green strips of card and paper and arranged them into a fun background.  I then printed this wonderful image onto a piece of scrap white card.  Coloured her with my watercolour pencils and added a touch of Kindy Glitz on the hem of the dress and her hat.  Finished with the perfect black sticker greeting.

Supplies: 


Not very often have I ever achieved this.......a Clean and Simple card.
I have gone around the edge of the card with my pen ....dotting and dashing. Stamped the wonderful Christmas trees (SU Crazy for Christmas) on to this strip of crepe paper.  The crepe paper is something I played with years ago and finally it has a home.  There were a group of us doing different marbling techniques.  It's that long ago I can't really remember what we did.  I know there was water involved and I think felt pens.

LinkWithin

Related Posts with Thumbnails